July 2, 2021 • ––– views
NGINX Treats


I've invested a lot of time since I've started programming on infrastructure — a web server is a crucial part of that.
There are all kind of web servers and each stand out from the rest by having unique features — being the better solution for your product, and many other factors.
This article talks about the open-sourced version of NGINX — an attempt to share some knowledge, best practices, and things to avoid.
Although NGINX can be used as a load balancer (layer 4), the content here only covers layer 7 capabilities of NGINX.
If you are curious about the layers and their numbering, it's based on the OSI model. You can read about it in detail at OSI model — Wikipedia
Table of contents
Introduction
This is not a comprehensive list of everything about NGINX — for that always refer to the documentation.
This is more like pieces of knowledge I learned through trial and error, ranging from common enhancements to some gotchas and correct usage of some features.
Keep in mind this is based on my experience, so it's highly advised to test things and make sure it's stable before using it in a production server.
The article is kinda long, however, I focused on separating things into sections where each section doesn't depend on others (to some degree). So pick any section and read it at your own pace.
Why do I need this?
Your webserver(s) is one the most crucial part of your infrastructure stack, even a small enhancement could have a large impact on your product.
Although it’s NGINX specific — web servers tend to share some common behavior and patterns.
Reading this will provide you with different ideas when building and tuning your server whether you are using NGINX or something different.
Decision making


Some general tips and concepts to keep in mind before you decide how you will adopt NGINX.
Do you even need NGINX?
Before starting with anything — understand the use case of introducing NGINX to your stack — have good knowledge about your environment, hardware capabilities and limitations — know what NGINX is supposed to do here.
- Acting as a proxy server?
- A caching layer for static assets?
- Everything that NGINX does in general to reduce the load on your software — usually the case when you have a web server not optimized to deal with things like SSL or request buffering — so adding NGINX will give you a free boost
If you can't answer these questions or don't know then you might not need it from the beginning and there are better solutions to your problem.
The holy grail of NGINX configuration
There is no such thing as one set of configurations that fits all products. Every configuration you set along their values depends on the product use case — you still can create a generic configuration boilerplate and tune it differently based on what you're working with.
Separation of concerns
Just like Back-end, Front-end, and probably anything related to programming — don't write your whole configuration in one file, follow the DRY concept and split them based on what they do.
For common security headers, you could have security.conf — for compression you would be having a compression.conf. This way your configuration is reusable — maintainable and more (AKA am too lazy to mention).
Preparations
For new products — know what NGINX modules you will need or might need in the future, nginx -V will output what modules NGINX was compiled with — this is important because you will have to re-compile NGINX if you want to add more modules.
For established products, this might be not feasible in some production environments where the time spent doing that doesn't justify the added value of those new modules.
Validating the result
Test, then test, and finally test. Sometimes asserting that your configuration is optimal can be tricky, you could be having invalid results due to unknown circumstances — maybe your hosting platform was stable at one time, on another it wasn't or it could be a misuse of the testing method.
For example, benchmarking throughput by hitting a single endpoint rather than creating a realistic usage scenario in production.
Benchmarking NGINX
Best practices to follow when benchmarking NGINX, created by NGINX team
Based on the above — take what I'm writing with a grain of salt and test it again for the fourth time, make a bet with a colleague to break your new setup.
Performance

For me Performance doesn't mean speed — it’s a combination of:
- Stability
- Resilience
- Resources consumption
- Speed
Location blocks
Sooner or later you're gonna have location blocks to match paths according to a pattern by using regex expressions.
location ~* \.(?:css|js|jpg|jpe?g|gif|png|svg)$ {
  proxy_pass http://my-server;
}
If NGINX matches those locations a lot — In other words the matched location is regularly requested, you could improve the performance of the matching process by enabling PCRE JIT — assuming you have NGINX compiled with the PCRE module.
This directive enables NGINX to evaluate and store the regex expressions matching process at the time of configuration parsing which happens on NGINX startup — to enable it simply add pcre_jit on on top of your main configuration file.
# run with nginx user
user nginx;
# enable PCRE JIT compiler for faster location blocks parsing
# https://nginx.org/en/docs/ngx_core_module.html#pcre_jit
pcre_jit on;
Access log
NGINX access_log logs every request — not just the path of the request, also everything requested on the page — which you probably don't need (logging in terms of performance seems to be overlooked). Disable it with access_log off in your main configuration file HTTP block.
error_log  /var/log/nginx/error.log warn;

http {
  # disabled access_log, we still have error logging
  access_log  off;
}
Send file
With the send_file directive enabled, set sendfile_max_chunk to a low value to prevent send_file from transferring a large amount of data like images or font files.
Because the default of sendfile_max_chunk is 0 which means unlimited — we need to adjust the value from 0 to something like 512k(0.5 MB) then send_file will send the data in chunks, the size of each chunk would be 512k.
The whole point of this is to prevent a connection from blocking a worker process and destabilize your app throughput.
http {
  sendfile on;
  sendfile_max_chunk 512k;
}
Hashmaps
In addition to PCRE JIT optimization — for other looks ups NGINX uses hash tables. Here we have some directives with their default values that control the size of the used hash tables — tune them based on your hardware specs.
A detailed guide on their usage can be found on Setting up hashes (you should start from this link).
http {
  server_names_hash_max_size 512;
  server_names_hash_bucket_size 64;
}
Also checkout hash tables used by the proxy modules
types_hash_max_sizeproxy_headers_hash_bucket_sizeproxy_headers_hash_max_size
Documentation can be found at HTTP core module and HTTP proxy module.
After tweaking the values the benefits are not only faster responses but also more stability — because this speeds up key search in hash tables then we would have less memory access and a decreased pressure on the CPU.
Proxy buffering
Proxy buffering directive(s) controls how NGINX handles transferring the response from the proxied server to the client.
This is a large topic that I might write about it in a separate article, however personally I follow these rules:
-
If the buffer's value is too low then NGINX response will have high latency, so I keep increasing.
-
If the buffer's value is high then you will destabilize your server by allocating too many buffers in the memory (per request).
-
After trial and error tuning the buffers for something in between and I start seeing improved performance — I keep tuning until the performance starts to drop. Then this is an optimal value for this specific product on this specific hardware
-
After achieving the above if the response doesn’t fit in the buffer size I allocated, NGINX would have to save part of it on disk temporarily — send the part allocated in memory then read the temp file and send the remaining buffers.
This can be tuned by allowing NGINX to allocate everything in the memory instead of using the disk as a temp — for this particular case it’s up to you on how you control it but I prefer keeping the memory stable and let NGINX write temp files.
Refer to Proxy buffering Documentation for more details.
The following topics will not be covered here, maybe I'll write another article dedicated to them
worker_processesworker_connectionsworker_rlimit_nofileworker_cpu_affinity- NGINX multi-threading and thread pools using
aio - Sockets Sharding by using SO_REUSEPORT socket option via
reuseport
The first 4 directives need a lot of research before you apply them, however, I use NGINX on this site.
I kept NGINX configuration on a separate branch — for those 4 directives you can read my configuration file which has brief documentation about them — for compression, there is also a configuration file documented. Actually, you know what? you could also start from the configuration root folder and read the rest — you might find some weird things used as a workaround for handling some Next.js issues for my site which is self-hosted so things differ from using Vercel.
Gotchas
This is some stuff I found somewhere on the internet — randomly, while I'm researching a specific topic and issues, maybe from an article I read somewhere, who knows!
The host IP address
I'm definitely not a security expert but I don't want NGINX to be accessible by requesting the host IP address rather than the domain name regardless of the client.
Examples (with dummy IP) would be something like these:
HTTP request on port 80 => 78.555.666.33
HTTPS request on port 443 => 78.555.666.33:443
After some research the solutions I found basically cover the non-HTTPS part and NGINX will return whatever error or page you decide.
However, for HTTPS I found nothing — the response would be returned from the browser with the infamous Invalid certificate error page.

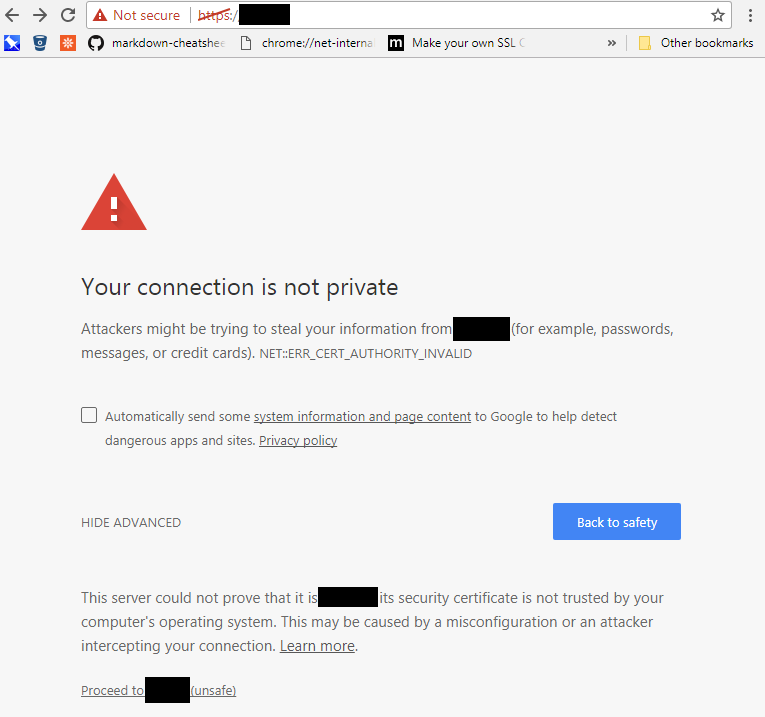
Which makes sense! How? Well, when you generated your certificate from whatever provider it was issued for your domain, not the IP address — you could go down the rabbit hole looking for a way to get a certificate that works with IP address, and if it works you solve the problem.
I have no clue if there is a way to issue a cert for IP address neither care about it.
Also, you shouldn't rely on IP addresses anyway — with many deployments on various cloud providers you’re gonna have to deal with floating IP(s), DNS resolvers (why did you call it Route 53??!).
Note: read the update below this section for the updated more secure solution
On some random day, debugging random issue I found a way to block access to your application through IP address regardless of the HTTP protocol, then you return whatever you want.
Cloudflare already has this built-in, try it on a site that uses Cloudflare, it will show a page that you can't access the site from an IP address, guess who uses Cloudflare ☝️ ?
The suggestion came from a NGINX Issue that basically uses aNULL cipher (Okay Okay I know, don't start raging now... it's just an experiment) here is the workaround
map "" $empty {
    default "";
}
server {
    listen 80 default_server;
    listen [::]:80 default_server;
    listen 443 default_server;
    listen [::]:443 default_server;
    server_name _;

    ssl_ciphers aNULL;
    ssl_certificate data:$empty;
    ssl_certificate_key data:$empty;
    return 444;
}
We create a map and assign the value to the variable $empty, the map has just a default condition with the empty string value so the $empty value would be.... empty!
Then we have a server block that listens to both ports 80 and 443 IPv4 and IPv6.
This block is the default server block in NGINX by adding default_server in the listen directive and the server name is anonymous — in other words, NGINX will use this block if it can't find the route in every other defined server block.
Which is the case we need, accessing the server through an IP address will not match the other server blocks — just make sure every other block has a server_name added with your domain and sub-domains values.
After we provide the empty value variable for ssl_certificate, ssl_certificate_key with the addition of ssl_ciphers aNULL then NGINX won't complain about invalid cert — because the provided cipher means no authentication required.


Now any access through the server IP will return a 444 status code error the only problem is (again not a security expert) using aNULL could open your server to other vulnerabilities.
Now it's up to you if you want this or not, you can remove the HTTPS part and use it for HTTP only — if you have a new NGINX version then try the suggested solution in the issue by using ssl_reject_handshake.
Updated at August 17,2021:
I tried the new directive ssl_reject_handshake instead of the aNULL hack with my NGINX setup, and it worked — Yeah… now I’m calling my previous solution a hack after finding a better one, typical programmer behavior.
 server {
     listen 80 default_server;
     listen [::]:80 default_server;
     listen 443 default_server;
     listen [::]:443 default_server;
     server_name _;
     ssl_reject_handshake on;
     location / {
         return 444;
     }
 }
This directive was added recently, so check the documentation to see if you can add it — otherwise you can use the original hack mentioned above.
On a serious note, I had no problem with the old method but I’d advice you to consult someone with security expertise — if you feel that you have provoked the security expertise when mentioning the above, do me a favor and don’t cite me as a resource 🤔.
And this is the updated snippet for this site nextjs.conf.
Headers placement
There are 2 kinds of adding headers in NGINX. The first would be add_header and the second is proxy_set_header.
proxy_set_header enables NGINX to send more request headers to the proxied server in addition to the headers the client sent, so this directive is internal between NGINX and the proxied server.
add_header enables NGINX to add response headers to the client in addition to the headers from the proxied server, so this directive is external when NGINX returns a response back to the client.
Both of those directives behave the same way based on their placement, and by placement, I mean their actual location in your configuration file — they could be found in a server block or a location block that is inside a server block.
For example
server {
    add_header value1 "1";
    add_header value2 "2";
    location / {
        add_header value3 "3";
        add_header value4 "4";
        proxy_pass http://my-server;
    }
}
The client would receive the two headers value3 and value4.
value1 and value2 will not be sent — due to the location block add_header directives overrides the previous configuration level which is server.
To make sure all your headers are sent you need to add all of them in the same configuration level, the same thing applies to proxy_set_header.
Now, this is annoying especially if you have a large configuration, we can solve it by using the method I suggested in the Tips section — separate configuration files so they can be reusable.
A good practice is to create two files, one for the proxy headers and another for the client headers — then simply include the file in the level you would want to apply the headers for.
server {
  location ~* \.(?:css|js|jpg|jpe?g|gif|png|svg)$ {
    # default client headers
    include /etc/nginx/client_headers.conf;
    proxy_pass http://my-server;
  }

  location =/ {
    # default proxy headers
    include /etc/nginx/proxy.conf;
    # we also can add both
    # default client headers
    include /etc/nginx/client_headers.conf;
    # and a third one that contains common security headers
    # default client security headers
    include /etc/nginx/client_security_headers.conf;
    proxy_pass http://my-server;
  }
}
Conclusion
Obviously, this article doesn't cover everything. NGINX is one of those tools that have an endless learning experience, every once in a while you discover something new.
I might write another article about topics I didn't cover including
- Dealing with SSL certificate, from issuing the cert to creating a configuration optimized for performance while maintaining security, and a bonus auto-renewal functionality.
- Compression algorithms, Brotli and Gzip.
- Caching static and dynamic responses via different NGINX modules. How and when to invalidate stale data.
- Docker setup.
- Creating a NGINX server from installation, configuration, dealing with SSL to serving content live.
Most of the above implementation can be found in my repo. With a bit of adjustment, you probably can try and use them.
omaralsoudanii/mkreg.dev
NGINX configuration in conjunction with HAProxy, Cloudflare and Docker for https://mkreg.dev/
Feel free to contact me via the links provided in the footer if there is outdated, wrong info provided here or if you would like to rant about something I wrote (I know you do). Seriously even if you have some questions, contact me.